Thursday, 28 February 2013

Remove Content Adviser Password from Internet Explorer

remove content adviser password from window xp internet explorer 6.0
Remove content adviser password from window xp internet explorer 6.0

First you need to make a backup of registry:

1 Click on Start
2 Choose Run.
3 In the Open field, type regedit.
4 Click the File menu
5 Then Choose Export.
6 In the File name field, type backup.
7 Click Save.

The following steps will remove any password set in the Internet Explorer Content Advisor and allow you to reset the program to its original state.

1 Go to start, run, type "regedit" and press "OK".
2 Expand the folders down the left, in this order.
  HKEY_LOCAL_MACHINE
  >Software
  >Microsoft
  >Windows
  >CurrentVersion
  >Policies
  >Ratings
3 On the right you will see the word "Key" - Click on it once, then press "del" or right click, and select delete.
4 Close the registry editor.
5 Go to start, run, type "explorer" and press "OK".
6 Navigate to C:\Windows\System and delete "ratings.pol"
7 Restart the computer and run Internet Explorer again.
8 Choose Tool and then Internet Options
9 Click on the Content tab and click on Disable. When asked for a password, don't enter anything; just click on OK. This will disable Content Advisor because there's no longer a password.

If face any problem try another way to remove any password set in the Internet Explorer Content Advisor and allow you to reset the program to its original state.

1 Go to start, run, type "Notepad" and press "OK".
2 Copy below code

Windows Registry Editor Version 5.00

[-HKEY_LOCAL_MACHINE\SOFTWARE\Microsoft\Windows\CurrentVersion\policies\Ratings]

[HKEY_LOCAL_MACHINE\SOFTWARE\Microsoft\Windows\CurrentVersion\policies\Ratings]

3 Then past into notepad & save as remove-content-adviser.reg on Desktop
4 After save go to desktop & click to open remove-content-adviser.reg
5 Click Yes Then OK
6  Now you've just deleted your original Content Advisor password.

Thursday, 29 November 2012

Remove Newer and Older Post Links from Blogger

Remove Newer and Older Post Links from Blogger
  1. Login to Blogger with your ID.
  2. Click Template.
  3. Click tab Edit HTML > Proceed >
  4. Check Expand Widget Templates Box
  5. Find the Following Part of Code 
#blog-pager-newer-link {
float: left;
}
#blog-pager-older-link {
float: right;
}
#blog-pager {
text-align: center;
}

5. Then REPLACE it with.

#blog-pager-newer-link {
display: none;
}
#blog-pager-older-link {
display: none;
}
#blog-pager {
display: none;
}

6. Save Template  & Check For Changes !

Thursday, 22 November 2012

Disable Right Click On Blogger

Disable Right Click On Blogger

1. Login to Blogger with your ID.
2. Click Template.
3. Click tab Edit HTML > Proceed >
4. Check Expand Widget Templates Box
5. Find the following code

<body>

6. Replace the code you found with the following code:

<body oncontextmenu="return false">

7. Save Template & See the Result.

Wednesday, 21 November 2012

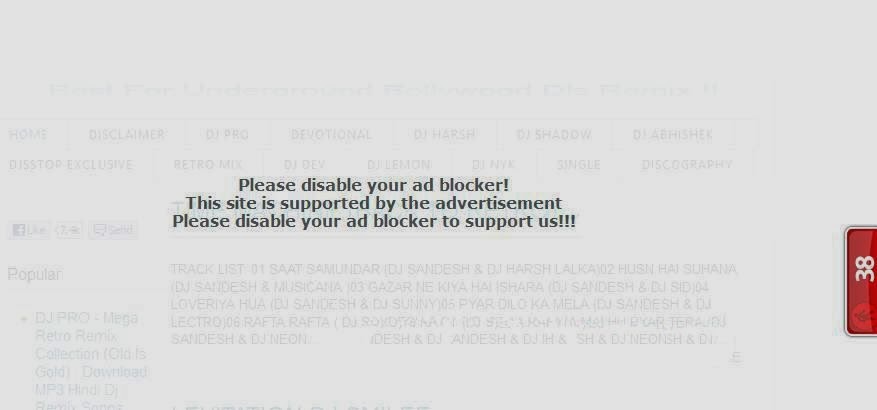
Show Ad Blocker Disable Warning on Your Blogger Blogspot [if Adblock Extension is Installed]

Show AdBlocker Disable Warning on Your Blogger Blogspot if Adblock Extension is Installed

1. Login to Blogger with your ID.
2. Click Template.
3. Click tab Edit HTML > Proceed >
4. Find & Past Below Code Before ]]></b:skin>

#g207{position:fixed!important;position:absolute;top:0;top:expression((t=document.documentElement.scrollTop?document.documentElement.scrollTop:document.body.scrollTop)+"px");left:0;width:100%;height:100%;background-color:#fff;opacity:0.9;filter:alpha(opacity=90);display:block}#g207 p{opacity:1;filter:none;font:bold 16px Verdana,Arial,sans-serif;text-align:center;margin:20% 0}#g207 p a,#g207 p i{font-size:12px}#g207 ~ *{display:none}

5. Save Template.
6. Go to Blogger >> Layout >> Click on Add a Gadget >>  Select HTML/JavaScript >> Then Copy & Past Below HTML Code.

<script>(function(w,u){var d=w.document,z=typeof u;function g207(){function c(c,i){var e=d.createElement('i'),b=d.body,s=b.style,l=b.childNodes.length;if(typeof i!=z){e.setAttribute('id',i);s.margin=s.padding=0;s.height='100%';l=Math.floor(Math.random()*l)+1}e.innerHTML=c;b.insertBefore(e,b.childNodes[l-1])}function g(i,t){return !t?d.getElementById(i):d.getElementsByTagName(t)};function f(v){if(!g('g207')){c('<p>Please disable your ad blocker!<br/>This site is supported by the advertisement <br/> Please disable your ad blocker to support us!!! </p>','g207')}};(function(){var a=['Adrectangle','PageLeaderAd','ad-column','advertising2','divAdBox','mochila-column-right-ad-300x250-1','searchAdSenseBox','ad','ads','adsense'],l=a.length,i,s='',e;for(i=0;i<l;i++){if(!g(a[i])){s+='<a id="'+a[i]+'"></a>'}}c(s);l=a.length;for(i=0;i<l;i++){e=g(a[i]);if(e.offsetParent==null||(w.getComputedStyle?d.defaultView.getComputedStyle(e,null).getPropertyValue('display'):e.currentStyle.display)=='none'){return f('#'+a[i])}}}());(function(){var t=g(0,'img'),a=['/adaffiliate_','/adops/ad','/adsales/ad','/adsby.','/adtest.','/ajax/ads/ad','/controller/ads/ad','/pageads/ad','/weather/ads/ad','-728x90-'],i;if(typeof t[0]!=z&&typeof t[0].src!=z){i=new Image();i.onload=function(){this.onload=z;this.onerror=function(){f(this.src)};this.src=t[0].src+'#'+a.join('')};i.src=t[0].src}}());(function(){var o={'http://pagead2.googlesyndication.com/pagead/show_ads.js':'google_ad_client','http://js.adscale.de/getads.js':'adscale_slot_id','http://get.mirando.de/mirando.js':'adPlaceId'},S=g(0,'script'),l=S.length-1,n,r,i,v,s;d.write=null;for(i=l;i>=0;--i){s=S[i];if(typeof o[s.src]!=z){n=d.createElement('script');n.type='text/javascript';n.src=s.src;v=o[s.src];w[v]=u;r=S[0];n.onload=n.onreadystatechange=function(){if(typeof w[v]==z&&(!this.readyState||this.readyState==="loaded"||this.readyState==="complete")){n.onload=n.onreadystatechange=null;r.parentNode.removeChild(n);w[v]=null}};r.parentNode.insertBefore(n,r);setTimeout(function(){if(w[v]!==null){f(n.src)}},2000);break}}}())}if(d.addEventListener){w.addEventListener('load',g207,false)}else{w.attachEvent('onload',g207)}})(window);</script>

7. Now Click On Save & Say thanks to Antiblock.org


If not work 1st trick on your BLOG. please try another:

1. Login to Blogger with your ID.
2. Click Template.
3. Click tab Edit HTML > Proceed >
4. Find & Past Below Code Before ]]></b:skin>

#mbl_noadblocker {
display:none;
}

6. Now Find & Past Below Code Before </head> 

<script type="text/javascript">
if (document.getElementById("mbl_noadblocker") != undefined)
{
}
else
{
alert("We've detected that you're using AdBlock Plus or some other adblocking software. In order to keep this website free, this site is sponsored in part by advertisements.\r\nPlease consider disabling your ad blocker on this website\r\nif you enjoyed the content, and would like to support future \r\ninformative posts.Thank you!\r\n\r\nClick OK to continue\r\n\r\nPowered by VisualDreamersOfficial);
setTimeout("nag()",12000);
}
</script>

7. Now Find & Past Below Code After <body>

<script type="text/javascript" src="http://ftp.bauer-power.net/misc/tc/advertisement.js"></script>

8. Now Save Template | Via - mybloggerlab.com

Tuesday, 20 November 2012

View online EPF (Employees Provident Fund) Pass Book

View online EPF (Employees Provident Fund) Pass Book

View your EPF Account Passbook online | Use any of your ID details to login | View all your accounts at a single place | Get SMS when e-Passbook is available |

What is E-Passbook

E-Passbook is the employee Provident Fund status book (PDF). Employee can check own PF status.

Register Online

Go to member portal for register online to view your EPF Account Passbook. http://members.epfoservices.in/ then click register button & follow steps.

Note:

•  The facility at present is only for the members for whom the employer has uploaded the Electronic Challan Cum Return for the wage month of May 2012 onwards.
•  There is no need to create and remember any user id and password. You have to use your mobile number and any of your following identification proof number such as PAN, AADHAR, NPR (National Population Register), Bank Account, Voter ID, Passport or Driving License to register and thereafter to login.
•  You can add multiple id numbers (one id against each of the listed types) and any one along with the mobile number can be used for the login.
•  One mobile number can be used for one registration only.
•  A registered member can view only one account details under one establishment. In case you are having more than one account under    one establishment, please apply for transfer through the Form 13.
•  One member can view up to a maximum of 10 accounts under different establishments. The 10 accounts can be viewed any number of    times. Get your old accounts transferred to the current one by using the Transfer Form 13.
•  Facility to display the accounts of inoperative accounts will be provided later through a request mode.
•  The facility is not for the current members of establishments having exemption under the EPF Scheme 1952.
Employees Provident Fund >> Member Portal

Sunday, 18 November 2012

Redirect 404 Errors/Unavailable Blogger Post Page to Homepage or another URL

Redirect 404 Errors/Unavailable Blogger Post Page to Homepage or another URL

1. Login to Blogger with your ID.
2. Click Template.
3. Click tab Edit HTML > Proceed >
4. Click on Expand Widget Templates
5. Find & Past Below Code After <data:navMessage/> OR <b:if cond='data:navMessage'>

<b:if cond='data:navMessage == &quot;Sorry, the page you were looking for in this blog does not exist.&quot;'>
    &lt;script language=&quot;javascript&quot;&gt;
    window.location=&#39;<data:blog.homepageUrl/>&#39;;
    &lt;/script&gt;
    </b:if>

6. Now save your template and refresh any of your 404 error/unavailable blogger page to check if this script is working or not.
7. If you do not want too redirect your  404 error/unavailable blogger page to your homepage instead you want to redirect to some another website than just replace the <data:blog.homepageUrl/> line in above code with http://www.your-url.com and that’s it will start redirecting your error pages to that domain name.

Wednesday, 14 November 2012

Remove Attribution Widget from Blogger

REMOVE ATTRIBUTION WIDGET FROM BLOGGER


 Method 1

1. Login to Blogger with your ID.
2. Click Template.
3. Click tab Edit HTML > Proceed >
4. Check Expand Widget Templates Box
5. Find & Past Below Code Just Before  ]]></b:skin>

#Attribution1{display:none}

6. Save Template

Method 2

1. Login to Blogger with your ID.
2. Click Template.
3. Click tab Edit HTML > Proceed >
4. Check Expand Widget Templates Box
5. Find Below Code

<b:widget id='Attribution1' locked='true' title='' type='Attribution'>

6. Once you find  the attribution code, replace locked='true' with locked='false'
7. Save Template.

Now attribution gadget is unlocked and it can be removed from Blogger Layout.

Here Comes the Hammer: The Tech Industry&#39;s Three Crises

The next few years are going to be extremely uncomfortable, and maybe disastrous, for the tech industry. Political opposition to the big tec...