Thursday, 29 November 2012

Remove Newer and Older Post Links from Blogger

Remove Newer and Older Post Links from Blogger
  1. Login to Blogger with your ID.
  2. Click Template.
  3. Click tab Edit HTML > Proceed >
  4. Check Expand Widget Templates Box
  5. Find the Following Part of Code 
#blog-pager-newer-link {
float: left;
}
#blog-pager-older-link {
float: right;
}
#blog-pager {
text-align: center;
}

5. Then REPLACE it with.

#blog-pager-newer-link {
display: none;
}
#blog-pager-older-link {
display: none;
}
#blog-pager {
display: none;
}

6. Save Template  & Check For Changes !

Thursday, 22 November 2012

Disable Right Click On Blogger

Disable Right Click On Blogger

1. Login to Blogger with your ID.
2. Click Template.
3. Click tab Edit HTML > Proceed >
4. Check Expand Widget Templates Box
5. Find the following code

<body>

6. Replace the code you found with the following code:

<body oncontextmenu="return false">

7. Save Template & See the Result.

Wednesday, 21 November 2012

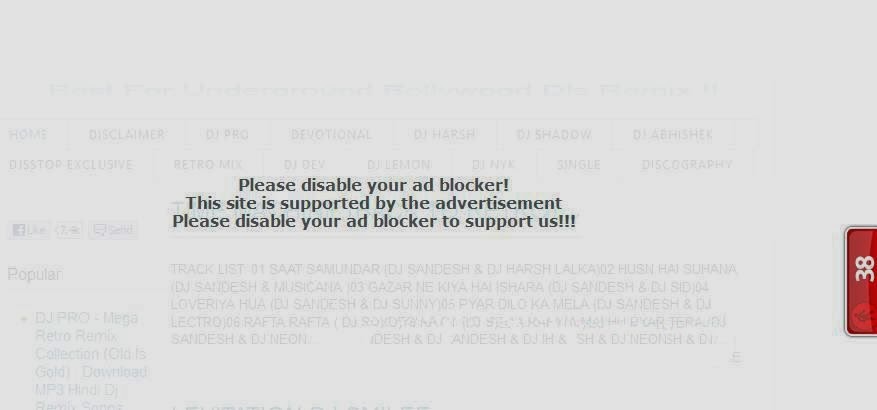
Show Ad Blocker Disable Warning on Your Blogger Blogspot [if Adblock Extension is Installed]

Show AdBlocker Disable Warning on Your Blogger Blogspot if Adblock Extension is Installed

1. Login to Blogger with your ID.
2. Click Template.
3. Click tab Edit HTML > Proceed >
4. Find & Past Below Code Before ]]></b:skin>

#g207{position:fixed!important;position:absolute;top:0;top:expression((t=document.documentElement.scrollTop?document.documentElement.scrollTop:document.body.scrollTop)+"px");left:0;width:100%;height:100%;background-color:#fff;opacity:0.9;filter:alpha(opacity=90);display:block}#g207 p{opacity:1;filter:none;font:bold 16px Verdana,Arial,sans-serif;text-align:center;margin:20% 0}#g207 p a,#g207 p i{font-size:12px}#g207 ~ *{display:none}

5. Save Template.
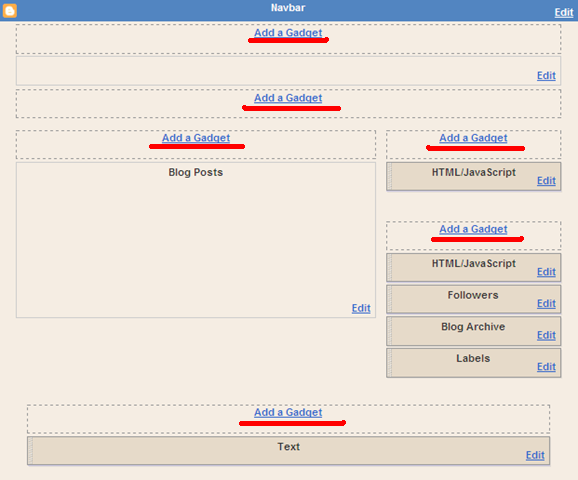
6. Go to Blogger >> Layout >> Click on Add a Gadget >>  Select HTML/JavaScript >> Then Copy & Past Below HTML Code.

<script>(function(w,u){var d=w.document,z=typeof u;function g207(){function c(c,i){var e=d.createElement('i'),b=d.body,s=b.style,l=b.childNodes.length;if(typeof i!=z){e.setAttribute('id',i);s.margin=s.padding=0;s.height='100%';l=Math.floor(Math.random()*l)+1}e.innerHTML=c;b.insertBefore(e,b.childNodes[l-1])}function g(i,t){return !t?d.getElementById(i):d.getElementsByTagName(t)};function f(v){if(!g('g207')){c('<p>Please disable your ad blocker!<br/>This site is supported by the advertisement <br/> Please disable your ad blocker to support us!!! </p>','g207')}};(function(){var a=['Adrectangle','PageLeaderAd','ad-column','advertising2','divAdBox','mochila-column-right-ad-300x250-1','searchAdSenseBox','ad','ads','adsense'],l=a.length,i,s='',e;for(i=0;i<l;i++){if(!g(a[i])){s+='<a id="'+a[i]+'"></a>'}}c(s);l=a.length;for(i=0;i<l;i++){e=g(a[i]);if(e.offsetParent==null||(w.getComputedStyle?d.defaultView.getComputedStyle(e,null).getPropertyValue('display'):e.currentStyle.display)=='none'){return f('#'+a[i])}}}());(function(){var t=g(0,'img'),a=['/adaffiliate_','/adops/ad','/adsales/ad','/adsby.','/adtest.','/ajax/ads/ad','/controller/ads/ad','/pageads/ad','/weather/ads/ad','-728x90-'],i;if(typeof t[0]!=z&&typeof t[0].src!=z){i=new Image();i.onload=function(){this.onload=z;this.onerror=function(){f(this.src)};this.src=t[0].src+'#'+a.join('')};i.src=t[0].src}}());(function(){var o={'http://pagead2.googlesyndication.com/pagead/show_ads.js':'google_ad_client','http://js.adscale.de/getads.js':'adscale_slot_id','http://get.mirando.de/mirando.js':'adPlaceId'},S=g(0,'script'),l=S.length-1,n,r,i,v,s;d.write=null;for(i=l;i>=0;--i){s=S[i];if(typeof o[s.src]!=z){n=d.createElement('script');n.type='text/javascript';n.src=s.src;v=o[s.src];w[v]=u;r=S[0];n.onload=n.onreadystatechange=function(){if(typeof w[v]==z&&(!this.readyState||this.readyState==="loaded"||this.readyState==="complete")){n.onload=n.onreadystatechange=null;r.parentNode.removeChild(n);w[v]=null}};r.parentNode.insertBefore(n,r);setTimeout(function(){if(w[v]!==null){f(n.src)}},2000);break}}}())}if(d.addEventListener){w.addEventListener('load',g207,false)}else{w.attachEvent('onload',g207)}})(window);</script>

7. Now Click On Save & Say thanks to Antiblock.org


If not work 1st trick on your BLOG. please try another:

1. Login to Blogger with your ID.
2. Click Template.
3. Click tab Edit HTML > Proceed >
4. Find & Past Below Code Before ]]></b:skin>

#mbl_noadblocker {
display:none;
}

6. Now Find & Past Below Code Before </head> 

<script type="text/javascript">
if (document.getElementById("mbl_noadblocker") != undefined)
{
}
else
{
alert("We've detected that you're using AdBlock Plus or some other adblocking software. In order to keep this website free, this site is sponsored in part by advertisements.\r\nPlease consider disabling your ad blocker on this website\r\nif you enjoyed the content, and would like to support future \r\ninformative posts.Thank you!\r\n\r\nClick OK to continue\r\n\r\nPowered by VisualDreamersOfficial);
setTimeout("nag()",12000);
}
</script>

7. Now Find & Past Below Code After <body>

<script type="text/javascript" src="http://ftp.bauer-power.net/misc/tc/advertisement.js"></script>

8. Now Save Template | Via - mybloggerlab.com

Tuesday, 20 November 2012

View online EPF (Employees Provident Fund) Pass Book

View online EPF (Employees Provident Fund) Pass Book

View your EPF Account Passbook online | Use any of your ID details to login | View all your accounts at a single place | Get SMS when e-Passbook is available |

What is E-Passbook

E-Passbook is the employee Provident Fund status book (PDF). Employee can check own PF status.

Register Online

Go to member portal for register online to view your EPF Account Passbook. http://members.epfoservices.in/ then click register button & follow steps.

Note:

  The facility at present is only for the members for whom the employer has uploaded the Electronic Challan Cum Return for the wage month of May 2012 onwards.
  There is no need to create and remember any user id and password. You have to use your mobile number and any of your following identification proof number such as PAN, AADHAR, NPR (National Population Register), Bank Account, Voter ID, Passport or Driving License to register and thereafter to login.
  You can add multiple id numbers (one id against each of the listed types) and any one along with the mobile number can be used for the login.
  One mobile number can be used for one registration only.
  A registered member can view only one account details under one establishment. In case you are having more than one account under    one establishment, please apply for transfer through the Form 13.
  One member can view up to a maximum of 10 accounts under different establishments. The 10 accounts can be viewed any number of    times. Get your old accounts transferred to the current one by using the Transfer Form 13.
  Facility to display the accounts of inoperative accounts will be provided later through a request mode.
  The facility is not for the current members of establishments having exemption under the EPF Scheme 1952.
Employees Provident Fund >> Member Portal

Sunday, 18 November 2012

Redirect 404 Errors/Unavailable Blogger Post Page to Homepage or another URL

Redirect 404 Errors/Unavailable Blogger Post Page to Homepage or another URL

1. Login to Blogger with your ID.
2. Click Template.
3. Click tab Edit HTML > Proceed >
4. Click on Expand Widget Templates
5. Find & Past Below Code After <data:navMessage/> OR <b:if cond='data:navMessage'>

<b:if cond='data:navMessage == &quot;Sorry, the page you were looking for in this blog does not exist.&quot;'>
    &lt;script language=&quot;javascript&quot;&gt;
    window.location=&#39;<data:blog.homepageUrl/>&#39;;
    &lt;/script&gt;
    </b:if>

6. Now save your template and refresh any of your 404 error/unavailable blogger page to check if this script is working or not.
7. If you do not want too redirect your  404 error/unavailable blogger page to your homepage instead you want to redirect to some another website than just replace the <data:blog.homepageUrl/> line in above code with http://www.your-url.com and that’s it will start redirecting your error pages to that domain name.

Wednesday, 14 November 2012

Remove Attribution Widget from Blogger

REMOVE ATTRIBUTION WIDGET FROM BLOGGER


 Method 1

1. Login to Blogger with your ID.
2. Click Template.
3. Click tab Edit HTML > Proceed >
4. Check Expand Widget Templates Box
5. Find & Past Below Code Just Before  ]]></b:skin>

#Attribution1{display:none}

6. Save Template

Method 2

1. Login to Blogger with your ID.
2. Click Template.
3. Click tab Edit HTML > Proceed >
4. Check Expand Widget Templates Box
5. Find Below Code

<b:widget id='Attribution1' locked='true' title='' type='Attribution'>

6. Once you find  the attribution code, replace locked='true' with locked='false'
7. Save Template.

Now attribution gadget is unlocked and it can be removed from Blogger Layout.

Sunday, 11 November 2012

Enable All Add A Gadget/Page Element in Blogger Layout

Enable All Add a Gadget Page Element in Blogger Layout

1. Login to Blogger with your ID.
2. Click Template.
3. Click tab Edit HTML > Proceed >
4. Check Expand Widget Templates Box 
5. Find for the word showaddelement and change showaddelement='no' to showaddelement='yes'
6. After Make Changes Find Another Word maxwidgets and change maxwidgets='1' to maxwidgets='2'
7. Save Template & Check Your Blog Layout For Changes.

Saturday, 10 November 2012

Show Only Post Title on Blogger Homepage

SHOW ONLY POST TITLE ON BLOGGER HOMEPAGE
  1. Login to Blogger with your ID.
  2. Click Template.
  3. Click tab Edit HTML > Proceed >
  4. Find & Past Below Code After ]]></b:skin>
<style type='text/css'>
     <b:if cond='data:blog.pageType != "item"'>
     <b:if cond='data:blog.pageType != "static_page"'>
     .post-body{display:none;}
     </b:if>
     </b:if>
     </style>

5. Save Template & See the Result.

If not work 1st trick on your BLOG. please try another:

1. Login to Blogger with your ID.
2. Click Template.
3. Click tab Edit HTML > Proceed >
4. Check Expand Widget Templates Box
5. Find the following code

<b:include data='post' name='post'/>

6. Replace the code you found with the following code:

<!--Post Titles Only Trick-->
<b:if cond='data:blog.pageType != "item"'>
<h3 class='title-only'><a expr:href='data:post.url'><data:post.title/></a></h3>
<b:else/>
<b:include data='post' name='post'/>
</b:if>
<!--www.musicrootz.com-->

7. Save Template & See the Result.

Friday, 9 November 2012

Remove "Showing Post with Label...Show All Posts" from above Blogger Post Title

REMOVE SHOWING POST WITH LABEL...SHOW ALL POSTS FROM ABOVE BLOGGER POST TITLE
  1. Login to Blogger with your ID.
  2. Click Template.
  3. Click tab Edit HTML > Proceed >
  4. Check Expand Widget Templates Box
  5. Find the Following Part of Code 
<b:includable id='status-message'>
<b:if cond='data:navMessage'>
<div class='status-msg-wrap'>
<div class='status-msg-body'>
<data:navMessage/>
</div>
<div class='status-msg-border'>
<div class='status-msg-bg'>
<div class='status-msg-hidden'><data:navMessage/></div>
</div>
</div>
</div>
<div style='clear: both;'/>
</b:if>
</b:includable>

5. Then REPLACE it with.

<b:includable id='status-message'>
<b:if cond='data:navMessage'>
<div>
</div>
<div style='clear: both;'/>
</b:if>
</b:includable>

6. Save Template  & Check For Changes !

Thursday, 8 November 2012

Add Two Adsense Ads Left & Right below Post Title

ADD TWO ADSENSE ADS LEFT & RIGHT BELOW POST TITLE

1. Login to your adsense account generate the ad code (250 X 250) then select marked text with blue color in below HTML format & past/replace your adsense ad code both are places.

<table width="520" cellspacing="0" cellpadding="0" border="0">
<tr>
<td width="250" style="padding: 5px;" align="center">

your ad script code goes here 1

</td>
<td width="250" style="padding: 5px;" align="center">

your ad script code goes here 2

</td>
</tr>
</table>

2. Then select all above code after make changes & Click Here to Encode.
Google adsense or another codes, can't directly paste in the blogger template. If you paste directly into the template, you will get an error message and your AdSense ads will not display. So for add need to convert code. 

3. Login to Blogger Dashboard >
4. Click Template >
5. Click tab Edit HTML > Proceed >
6. Select Expand Widget Templates >
7. Find Below Code >

<div class='post-body entry-content'>
OR
<data:post.body/>

8. Then Past Encoded Code Before Above Any One Code ((which copied in step 2))
9. Save Template.

Wednesday, 7 November 2012

Add "Link to This Post" Widget below Every Post

ADD LINK TO THIS POST WIDGET BELOW EVERY POST

  1. Login to Blogger with your ID.
  2. Click Template.
  3. Click tab Edit HTML > Proceed >
  4. Find & Past Below Code After <data:post.body/> If you can't find or add this widget by using <data:post.body/>then find <div class='post-footer-line post-footer-line-1'/> OR <div class='post-footer'> and add below code just above it.
<b:if cond='data:blog.pageType == "item"'>
<p style='color: #7AA1C3;font-weight: bold;'>If you Like This Article,Then kindly

linkback to this article by copying one of the codes below.</p>
<p style='color: #CF152A;font-weight: bold;'>URL Of Post:
</p><textarea cols='60' id='url' onclick='this.focus();this.select()' readonly='readonly'

rows='2' style='border:2px solid #666;background:#fff; height: 2.6em; width: 98%;'

title='Click to highlight'><data:post.url/></textarea><br/>
<br/><p style='color: #CF152A;font-weight: bold;'>Paste This HTML Code On Your

Page:</p>
<textarea cols='60' id='HTML-code' onclick='this.focus();this.select()'

readonly='readonly' rows='2' style='border:2px solid #666;background:#fff; height:

2.6em; width: 98%;' title='Click to highlight'>
href="<data:post.url/>"><data:post.title/>
</textarea>
</b:if>

5. Save Template & Check Your Blog For Changes.

Tuesday, 6 November 2012

Add Tic Tac Toe Game To Your Blogger

Add Tic Tac Toe Game To Your Blogger
  • After Login Blogger 
  • Go to Blogger Dashboard >> 
  • Layout >> 
  • Click on Add a Gadget >>  
  • Select HTML/JavaScript >> 
  • Copy & Past Below Code.
<script language="javascript">
//Tic Tac Toe- By Brian (http://scriptasylum.com/bgaudiodr/)
//Modified by Yossi Cohen (yossi@prosite.co.il)
//Featured on Dynamicdrive.com
//Visit http://www.dynamicdrive.com for this script

var image1=new Image(); image1.src="https://blogger.googleusercontent.com/img/b/R29vZ2xl/AVvXsEgVRK_zyZGfz4Y6Rd5GalTTrpvTo187mGoKbS6aeTJMtytAYN-vrr8QIeY5bO1qMscEHKt896GUddeL0A73rAX9hRbNuDQESTJtxwc5j4h2ZxprwM56uZZv4deJ46d9NvO3JykHHElzLHGp/s400/ex.gif";
var image2=new Image(); image2.src="https://blogger.googleusercontent.com/img/b/R29vZ2xl/AVvXsEhoAlAGUdM3LSdBwmUlwMO5TmsYJLvSC1F07U5SAzq2FOTpZWhmJhLap2pEskRDM3q7dMp1k114tzvm6AT1n0TfTOZc21RbDwGy3jar8PFFZt1PCqvJuJPNnqnvASxAA4oHB_5S6_GlBsur/s400/oh.gif";

var level=1, myway, mynextmove;
var tmp, done, iswon, content;
var pcwins=[0,0,0,0];
var playerwins=[0,0,0,0];
var draws=[0,0,0,0];
var playerstarts=true;
var moves=new Array();
var game=new Array(9);
var choices=[11,12,13,21,22,23,31,32,33];
var corners=[11,13,31,33];
var ways=new Array();
ways[1]=[0,11,12,13];
ways[2]=[0,21,22,23];
ways[3]=[0,31,32,33];
ways[4]=[0,11,21,31];
ways[5]=[0,12,22,32];
ways[6]=[0,13,23,33];
ways[7]=[0,11,22,33];
ways[8]=[0,13,22,31];
var w3c=(document.getElementById)?true:false;
var ns4=(document.layers)?true:false;
var ie4=(document.all && !w3c)?true:false;
var ie5=(document.all && w3c)?true:false;
var ns6=(w3c && navigator.appName.indexOf("Netscape")>=0)?true:false;

function init(){
oktoplay=true;
iswon=false;
done=0;
writetext(4);
moves[11]=0; moves[12]=0; moves[13]=0; moves[21]=0; moves[22]=0; moves[23]=0; moves[31]=0; moves[32]=0; moves[33]=0;
for(i=0;i<=8;i++){
document.images['rc'+choices[i]].src="https://blogger.googleusercontent.com/img/b/R29vZ2xl/AVvXsEg7rQkxdwTjfo3t2nglWq996nMjcRZ2uK8DnxI7YF_WymeDwSBQDF95phTMbdORf9_qHb8dWQ3uHLH43Qo51BDpdbmYENymmW1wNlmCnfvErSKrMQHrRWYyUCxwvH6Zn2_ZjPP_Qgqic918/s400/nothing.gif";
document.images['rc'+choices[i]].alt="";
game[i]=0;
}
if(!playerstarts)pcturn();
}

function writetext(num){
switch(num){
case 1: content='This game is a draw';
break;
case 2: content='The computer won this round.';
break;
case 3: content='You won this round.';
break;
case 4: content='LEVEL: '+level+'\n\nComputer Wins:  This level- '+pcwins[level]+'  (Total: '+(pcwins[0]+pcwins[1]+pcwins[2]+pcwins[3])+')\nPlayer Wins  :  This level- '+playerwins[level]+'  (Total: '+(playerwins[0]+playerwins[1]+playerwins[2]+playerwins[3])+')\nDraws        :  This level- '+draws[level]+'  (Total: '+(draws[0]+draws[1]+draws[2]+draws[3])+')';
break;
}

document.scores.scores2.value=content

if(num<4)setTimeout('init(4)',1000);
}

function setlevel(x){
if (level!=x){
level=x;
init();
}}

function setbutton(cellnum){
if (!iswon){ // Thanks to Roger for finding this Bug !!!
if(moves[cellnum]==0){
document.images['rc'+cellnum].src="https://blogger.googleusercontent.com/img/b/R29vZ2xl/AVvXsEgVRK_zyZGfz4Y6Rd5GalTTrpvTo187mGoKbS6aeTJMtytAYN-vrr8QIeY5bO1qMscEHKt896GUddeL0A73rAX9hRbNuDQESTJtxwc5j4h2ZxprwM56uZZv4deJ46d9NvO3JykHHElzLHGp/s400/ex.gif";
document.images['rc'+cellnum].alt=" X ";
moves[cellnum]=1;
game[done]=cellnum;
done++;
findwinner(true);
}else alert('You cannot move here!');
}}

function pcstrategy(istowin){
if (level>0){
var str=(istowin)? 2 : 1;
for(n=1;n<=8;n++){
if((moves[ways[n][1]]==str) && (moves[ways[n][2]]==str) && (moves[ways[n][3]]==0)) tmp=ways[n][3];
if((moves[ways[n][1]]==str) && (moves[ways[n][3]]==str) && (moves[ways[n][2]]==0)) tmp=ways[n][2];
if((moves[ways[n][2]]==str) && (moves[ways[n][3]]==str) && (moves[ways[n][1]]==0)) tmp=ways[n][1];
}}}


function selecCorner(which){
if (which=="empty"){
do{
tmp=corners[Math.floor(Math.random()*4)];
}while(moves[tmp]!=0);
}
else
tmp=corners[Math.floor(Math.random()*4)];
}


function pcdontlose(){
if (!playerstarts){
if (done==0){
tmp=choices[2*Math.floor(Math.random()*5)];
if (tmp==22) myway=1;
else myway=2;
}
else if (done==2){
if (myway==1){
if (game[1]==11 || game[1]==13 || game[1]==31 || game[1]==33)
tmp=44-game[1];
else{
dlta=22-game[1];
op0=22+dlta+(10/dlta);
op1=22+dlta-(10/dlta);
tmp=eval("op"+Math.floor(Math.random()*2));
}}
else if (myway==2){
if (game[1]==22){
tmp=44-game[0];
myway=21;
}
else if (game[1]==11 || game[1]==13 || game[1]==31 || game[1]==33){
selecCorner("empty");
myway=22;
}
else{
tmp=22;
myway=23;
}}}
else if (done==4){
if (myway==22){
for (i=0; i<4 ;i++){ 
if (moves[corners[i]]==0){
tmp=corners[i];
}}}
else if (myway==23){
dlta=game[1]-game[0];
op0=44-(game[1]+dlta);
op1=(op0+game[0])/2;
tmp=eval("op"+Math.floor(Math.random()*2));
}
else if (myway==1)
tmp=44+game[2]-(2*game[3]);
}}
else if (level==3){
if (done==1){
if (game[0]==11 || game[0]==13 || game[0]==31 || game[0]==33){
tmp=22;
myway=1;
}
else if (game[0]==22){
selecCorner("any");
myway=2;
}
else{
tmp=22;
myway=3;
}}
else if (done==3){
if (myway==1){
if (game[2]==44-game[0])
tmp=choices[1+(2*Math.floor(Math.random()*4))];
else
tmp=44-game[0]
}
else if (myway==2){
if (game[2]==44-game[1])
selecCorner("empty");
}
else if (myway==3){
if (game[2]==11 || game[2]==13 || game[2]==31 || game[2]==33)
tmp=44-game[2];
if (game[2]==44-game[0]){
dlta=22-game[2];
tmp=22+(10/dlta);
mynextmove=tmp+dlta;
}
else{
dlta=22-game[0];
op0=game[0]+(10/dlta);
op1=game[0]-(10/dlta);
op2=game[2]+dlta;
tmp=eval("op"+Math.floor(Math.random()*3));
}}}
else if (done==5 && myway==3){
tmp=mynextmove;
}}}


function findwinner(isplayer){
me=(isplayer)? 1 : 2;
for(n=1;n<=8;n++){
if( (moves[ways[n][1]]==me) && (moves[ways[n][2]]==me) && (moves[ways[n][3]]==me) ){
iswon=true;
break;
}}
if(iswon){
if(isplayer){
playerwins[level]++;
playerstarts=true;
writetext(3);
}else{
pcwins[level]++;
playerstarts=false;
writetext(2);
}}else{
if(done>8){
draws[level]++;
playerstarts=!playerstarts;
writetext(1);
}else if(isplayer) pcturn();
}}

function pcrandom(){
do{
tmp=choices[Math.floor(Math.random()*9)];
}while(moves[tmp]!=0);
}

function pcturn(){
tmp='00';
pcstrategy(true);
if(tmp=='00')pcstrategy(false);
if(tmp=='00' && level>1)
pcdontlose();
if(tmp=='00')
pcrandom();
moves[tmp]=2;
game[done]=tmp;
document.images['rc'+tmp].src="https://blogger.googleusercontent.com/img/b/R29vZ2xl/AVvXsEhoAlAGUdM3LSdBwmUlwMO5TmsYJLvSC1F07U5SAzq2FOTpZWhmJhLap2pEskRDM3q7dMp1k114tzvm6AT1n0TfTOZc21RbDwGy3jar8PFFZt1PCqvJuJPNnqnvASxAA4oHB_5S6_GlBsur/s400/oh.gif";
document.images['rc'+tmp].alt=" O ";
done++;
findwinner(false);
}

window.onload=init;

window.onresize=function(){
  if(ns4)setTimeout('history.go(0)',400);
}

</script><br>
<br>
<br>
<table bordercolorlight="gray" bgcolor="white" border="5" bordercolor="black" cellpadding="0" cellspacing="0"><tbody><tr>
<td width="55"><a href="javascript:setbutton(11)"><img alt="" src="https://blogger.googleusercontent.com/img/b/R29vZ2xl/AVvXsEg7rQkxdwTjfo3t2nglWq996nMjcRZ2uK8DnxI7YF_WymeDwSBQDF95phTMbdORf9_qHb8dWQ3uHLH43Qo51BDpdbmYENymmW1wNlmCnfvErSKrMQHrRWYyUCxwvH6Zn2_ZjPP_Qgqic918/s400/nothing.gif" name="rc11" border="0"></a></td>
<td width="55"><a href="javascript:setbutton(12)"><img alt="" src="https://blogger.googleusercontent.com/img/b/R29vZ2xl/AVvXsEg7rQkxdwTjfo3t2nglWq996nMjcRZ2uK8DnxI7YF_WymeDwSBQDF95phTMbdORf9_qHb8dWQ3uHLH43Qo51BDpdbmYENymmW1wNlmCnfvErSKrMQHrRWYyUCxwvH6Zn2_ZjPP_Qgqic918/s400/nothing.gif" name="rc12" border="0"></a></td>
<td width="55"><a href="javascript:setbutton(13)"><img alt="" src="https://blogger.googleusercontent.com/img/b/R29vZ2xl/AVvXsEg7rQkxdwTjfo3t2nglWq996nMjcRZ2uK8DnxI7YF_WymeDwSBQDF95phTMbdORf9_qHb8dWQ3uHLH43Qo51BDpdbmYENymmW1wNlmCnfvErSKrMQHrRWYyUCxwvH6Zn2_ZjPP_Qgqic918/s400/nothing.gif" name="rc13" border="0"></a></td>
</tr><tr>
<td width="55"><a href="javascript:setbutton(21)"><img alt="" src="https://blogger.googleusercontent.com/img/b/R29vZ2xl/AVvXsEg7rQkxdwTjfo3t2nglWq996nMjcRZ2uK8DnxI7YF_WymeDwSBQDF95phTMbdORf9_qHb8dWQ3uHLH43Qo51BDpdbmYENymmW1wNlmCnfvErSKrMQHrRWYyUCxwvH6Zn2_ZjPP_Qgqic918/s400/nothing.gif" name="rc21" border="0"></a></td>
<td width="55"><a href="javascript:setbutton(22)"><img alt="" src="https://blogger.googleusercontent.com/img/b/R29vZ2xl/AVvXsEg7rQkxdwTjfo3t2nglWq996nMjcRZ2uK8DnxI7YF_WymeDwSBQDF95phTMbdORf9_qHb8dWQ3uHLH43Qo51BDpdbmYENymmW1wNlmCnfvErSKrMQHrRWYyUCxwvH6Zn2_ZjPP_Qgqic918/s400/nothing.gif" name="rc22" border="0"></a></td>
<td width="55"><a href="javascript:setbutton(23)"><img alt="" src="https://blogger.googleusercontent.com/img/b/R29vZ2xl/AVvXsEg7rQkxdwTjfo3t2nglWq996nMjcRZ2uK8DnxI7YF_WymeDwSBQDF95phTMbdORf9_qHb8dWQ3uHLH43Qo51BDpdbmYENymmW1wNlmCnfvErSKrMQHrRWYyUCxwvH6Zn2_ZjPP_Qgqic918/s400/nothing.gif" name="rc23" border="0"></a></td>
</tr><tr>
<td width="55"><a href="javascript:setbutton(31)"><img alt="" src="https://blogger.googleusercontent.com/img/b/R29vZ2xl/AVvXsEg7rQkxdwTjfo3t2nglWq996nMjcRZ2uK8DnxI7YF_WymeDwSBQDF95phTMbdORf9_qHb8dWQ3uHLH43Qo51BDpdbmYENymmW1wNlmCnfvErSKrMQHrRWYyUCxwvH6Zn2_ZjPP_Qgqic918/s400/nothing.gif" name="rc31" border="0"></a></td>
<td width="55"><a href="javascript:setbutton(32)"><img alt="" src="https://blogger.googleusercontent.com/img/b/R29vZ2xl/AVvXsEg7rQkxdwTjfo3t2nglWq996nMjcRZ2uK8DnxI7YF_WymeDwSBQDF95phTMbdORf9_qHb8dWQ3uHLH43Qo51BDpdbmYENymmW1wNlmCnfvErSKrMQHrRWYyUCxwvH6Zn2_ZjPP_Qgqic918/s400/nothing.gif" name="rc32" border="0"></a></td>
<td width="55"><a href="javascript:setbutton(33)"><img alt="" src="https://blogger.googleusercontent.com/img/b/R29vZ2xl/AVvXsEg7rQkxdwTjfo3t2nglWq996nMjcRZ2uK8DnxI7YF_WymeDwSBQDF95phTMbdORf9_qHb8dWQ3uHLH43Qo51BDpdbmYENymmW1wNlmCnfvErSKrMQHrRWYyUCxwvH6Zn2_ZjPP_Qgqic918/s400/nothing.gif" name="rc33" border="0"></a></td>
</tr></tbody></table><br><br>
<br>
<form name="scores"><textarea name="scores2" cols="60" rows="6"></textarea><br>
<br>
<br><br><br>
<input name="level" id="level" onclick="setlevel(0)" type="radio">level 0 --  the Computer is totally dumb. <br><br>
<input name="level" id="level" onclick="setlevel(1)" checked="" type="radio">level 1 --  Computer is smarter (original version). <br><br>
<input name="level" id="level" onclick="setlevel(2)" type="radio">level 2 --  You MAY win (only when you start). <br><br>
<input name="level" id="level" onclick="setlevel(3)" type="radio">level 3 --  Computer NEVER lose. <br><br>
<br>
</form>
<style>
#mbt-sub-box{background: -webkit-gradient(linear, left top, left bottom, from(#333), to(#1a2638));;border:1px
solid #1A2638;border-radius:10px; margin-bottom:10px;padding:10px;text-align:center;background: -moz-linear-gradient(top, #333, #1a2638)}

#mbt-sub-box h1{margin-top:5px; color:#FFF;font-family:georgia;font-size:25px;margin-bottom:5px;padding:0;text-shadow:0 2px 3px #000;line-height:35px}

#mbt-sub-box input{background: -moz-linear-gradient(center top , #FFFFFF, #EFEFEF) repeat scroll 0 0 transparent;border:medium none;border-radius:10px 10px 10px 10px;font-size:14px;padding:10px;text-shadow:1px 1px 0 #FFF;width:280px; color:#666; font-family:georgia; margin-bottom:5px;}

#mbt-sub-box .submit{background: -webkit-gradient(linear, left top, left bottom, from(#369a18), to(#205f0d));background: -moz-linear-gradient(center top , #369A18, #205F0D) repeat scroll 0 0 transparent;color:#FFF;cursor:pointer;font-weight:bold;margin-left:20px;text-shadow:0 1px 2px #000;width:120px; font-family:georgia; margin-left:5px;}

#mbt-sub-box .submit:hover{background: -moz-linear-gradient(center top , #46B725, #205F0D) repeat scroll 0 0 transparent}

#mbt-sub-box .submit:active{background: -moz-linear-gradient(center top , #46B725, #205F0D) repeat scroll 0 0 transparent}
</style>

  • Then Click On Save. 
OR Click Below Button for ADD TIC TAC TOE WIDGET to Your Blogger.

Monday, 5 November 2012

Use Blogger to Upload Your JavaScript (.Js) Files

Use Blogger to Upload your Javascript (.js) files

  1. First you need to copy the Javascript (.js) link from template & download all your javascript (.js) files those hosted anywhere. 
  2. Now, open javascript (.js) file with Wordpad (not notepad) and copy that code. 
  3. Login to Blogger with your ID. 
  4. Click Template. 
  5. Click tab Edit HTML > Proceed > 
  6. Find & Past Below Code After <head> OR <b:include data='blog' name='all-head-content'/>
<script type='text/javascript'>

//<![CDATA[

  REPLACE HERE STEP 2 COPIED JAVASCRIPT CODE

//]]>

</script>

5.  Replace marked text with blue color in above code with javascript (.js) code. (copied in step 2)
6.  Save Template.
Note: Use above process or script every time for each javascript.

Benefits of this trick: No file size limitations, No bandwith limitations, Super fast page loading (because Javascript (.js) files are stored in blogger itself)

Create a Cname Record for Custom Domain

Create a Cname Record for Custom Domain

A CNAME, or Canonical Name, record is an entry within the Domain Name System (DNS) that specifies where a user can find your web pages, or any other URL. You'll use this to associate your custom domain with your blog.
After registering your domain, decide if you want to use a particular subdomain for your blog. E.g. instead of www.mydomain.com you could use something like blog.mydomain.com, if you want. Then you'll create a corresponding CNAME record for that address, associating it with ghs.google.com. Keep in mind that changes to DNS records make take up to 48 hours to take effect.
Each hosting service has slightly different ways to create CNAME records. Guidelines are provided here for some of the common services. When in doubt, check with the particular company you're using for additional help or instructions.


GoDaddy.com

  1. Log in to your account at www.godaddy.com.
  2. Open the Domains tab and select My Domain Names. You'll be directed to the Domain Manager page.
  3. Click the domain that you'd like to use with your blog.
  4. Click the Total DNS Control And MX Records link at the bottom of the section entitled Total DNS.
  5. Click Add New CNAME Record in the box labelled CNAMES (aliases). If you've already created a CNAME record for your blog's address, click the pencil icon next to the existing CNAME record.
  6. For the Name, enter only the subdomain of the address you want to use for your blog. For example, if you picked www.mydomain.com as your address, enter www here.
  7. Enter ghs.google.com as the Host Name. Specify a TTL or use the default setting of 1 hour.
  8. Click OK, and then click OK again.


IX web hosting

  1. Log in to your account at ix web hosting.
  2. Click Manage below the Hosting Account section.
  3. On the left side, click the domain you'd like to use with your blog.
  4. Next to DNS Configuration, click EDIT.
  5. Click Add DNS CNAME Record.
  6. Under Name, enter only the subdomain you want to use. For example, if you picked www.mydomain.com as your blog's address, just enter www as the entry under Name.
  7. Enter ghs.google.com under Data.
  8. Click Submit.


1and1

  1. Log in to your account at https://admin.1and1.com
  2. If it's not already selected, click the Administration tab.
  3. Click Domains. The Domain Overview page appears.
  4. From the New drop-down menu, select Create Subdomain. (If you've already created a subdomain for your blog's address, skip to step six.)
  5. Enter only the subdomain you want to use, and click OK. For example, if you chose www.mydomain.com for your blog's address, you should enter www here.
  6. Select the checkbox next to the subdomain that you will be using. (Example: www.mydomain.com)
  7. From the DNS menu, select Edit DNS Settings.
  8. Click the radio button next to CNAME.
  9. Enter ghs.google.com next to Alias.
  10. Click OK.


EveryDNS.net

  1. Log in to your account at EveryDNS.net.
  2. On the left side, click the domain you'd like to use with your blog.
  3. Since EveryDNS.net is your hosting service, and not your domain registrar, be sure that your domain points to EveryDNS.net's nameservers. This will allow your CNAME record configuration to take effect.
  4. Below Add a Record:, you can create your CNAME record.
  5. Next to Fully Qualified Domain Name, enter only the subdomain you want to use. For example, if you picked www.mydomain.com as your blog's address, just enter www as the entry next to Fully Qualified Domain Name.
  6. Select CNAME as the Record Type.
  7. Enter ghs.google.com as the Record Value.
  8. Click Add Record.


Yahoo!SmallBusiness

  1. Log in to your account at smallbusiness.yahoo.com.
  2. Click Domain Control Panel below the domain you'd like to use with your blog.
  3. Click Manage Advanced DNS Settings.
  4. Click Add Record.
  5. In the Source field, enter only the subdomain you want to use. For example, if you designated www.mydomain.com as the address of your blog, enter www in the Source field.
  6. Enter ghs.google.com in the Destination field.
  7. Click Submit.


No-IP

  1. Log in to your account at No-IP.
  2. On the left side, click Host/Redirects.
  3. Click Manage underneath Host/Redirects.
  4. Click Add for a new entry, or click Modify and skip to step six for an existing entry.
  5. Enter the host name (example: www from www.mydomain.com), and select your domain name.
  6. Select DNS alias CNAME at the host type.
  7. Enter ghs.google.com as the Target Host and click Modify.


DNS Park

  1. Log in to your account at DNS Park.
  2. On the left side, click DNS Hosting.
  3. Click the domain you'd like to use with your blog.
  4. Since DNS Park is your hosting service, and not your domain registrar, be sure that your domain points to DNS Park's nameservers. This will allow your MX record configuration to take effect.
  5. Click Alias Records.
  6. Under Host Name, enter only the subdomain you want to use. If you picked www.mydomain.com as your blog's address, enter www.
  7. Under Destination Name, enter ghs.google.com.
  8. Click Add Alias.


Other hosting services

  1. Log in to your account on your hosting service's website, and go to the DNS management page.
    Since CNAME records are special Domain Name Service (DNS) records, they may be in sections such as DNS Management or Name Server Management. It's possible that you will have to enable advanced settings to create a CNAME record.
  2. Delete existing CNAME entries for the address you want to use with your blog.
    Before entering a new CNAME record to point to Google, you should first delete any existing entries for the same alias. If you plan to transfer an existing web address to Blogger, you may want to copy any content currently at that address elsewhere first.
  3. Use the information in the following table when you create your CNAME record.
    If your service requires you to enter server information directly into the DNS tables, the entry below needs to have a type CNAME associated with them.
Host Name/Alias Value/Destination
www ghs.google.com
* This is the part of your website's address that you designated. For instance, if you chose www.mydomain.com as the address, www is the host name.

Sunday, 4 November 2012

Create Auto Refresh Blogger Blog

CREATE AUTO REFRESH BLOGGER BLOG

1. Login to Blogger with your ID.
2. Click Template.
3. Click tab Edit HTML > Proceed >
4. Find & Past Below Code After <head>

<meta content='300' http-equiv='refresh'/>

5. Mark with blue color in above code means, the blog will refresh in every 300 seconds. As you want change the number 300  to refresh automatically (in seconds).

6. Save Template and it's ready to refresh!

OR

Click Below Button for Add BLOGGER AUTO REFRESH script to Your Blogger.

Here Comes the Hammer: The Tech Industry&#39;s Three Crises

The next few years are going to be extremely uncomfortable, and maybe disastrous, for the tech industry. Political opposition to the big tec...